
Angular's Route Reuse Strategy is similar to Vue's keep-alive and React's experimental Activity, offering the capability to retain component states, but at the routing level. Today, I will explore how to implement a custom route reuse strategy in Angular, demonstrate its benefits through a practical example, and discuss some notable challenges I encountered.
Picture this: you're using an Angular app with a detailed dashboard that includes advanced filters and shows data fetched from an API. You carefully set your filters, review the data, and then move to another page. But when you return to the dashboard, the component reloads entirely, leading to delays as it reinitializes and processes the data again. On top of that, you lose important state details, like your filter settings, because the component resets completely.
Let's Start
Now, I have a demo app with such a scenario. The demo app roughliy have two pages:
-
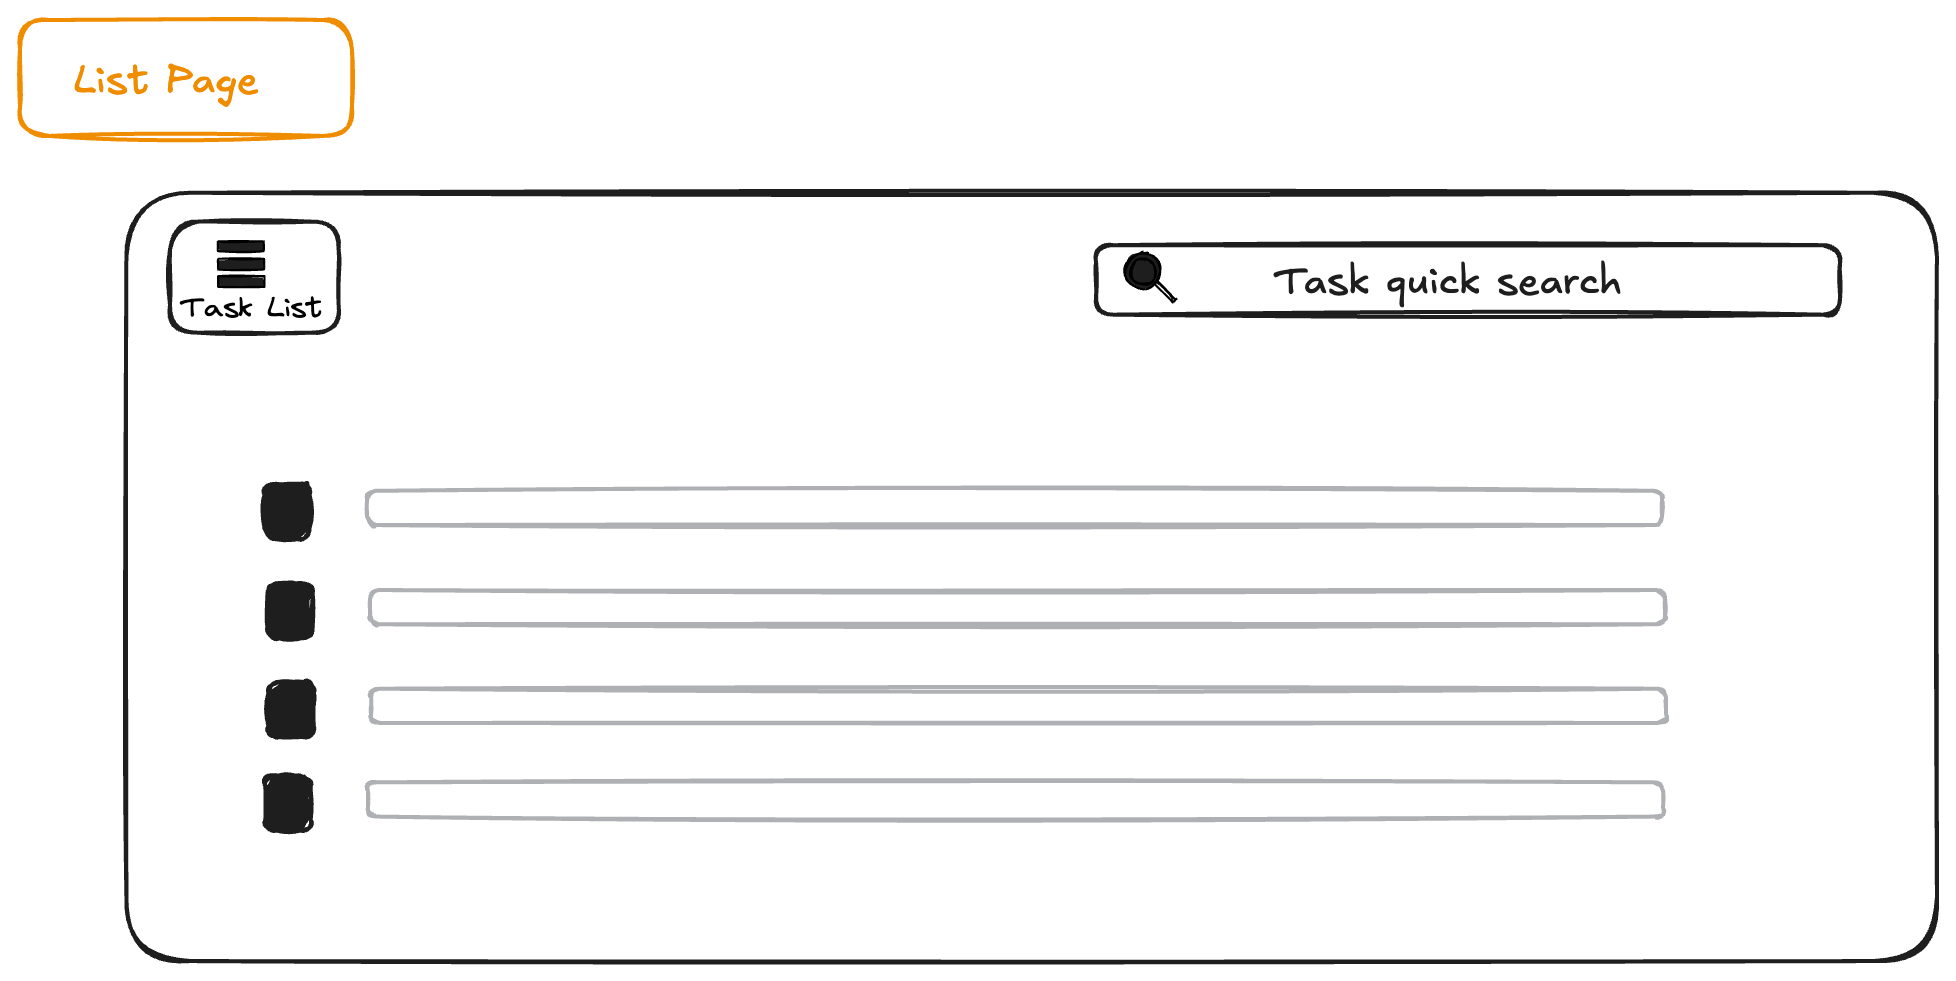
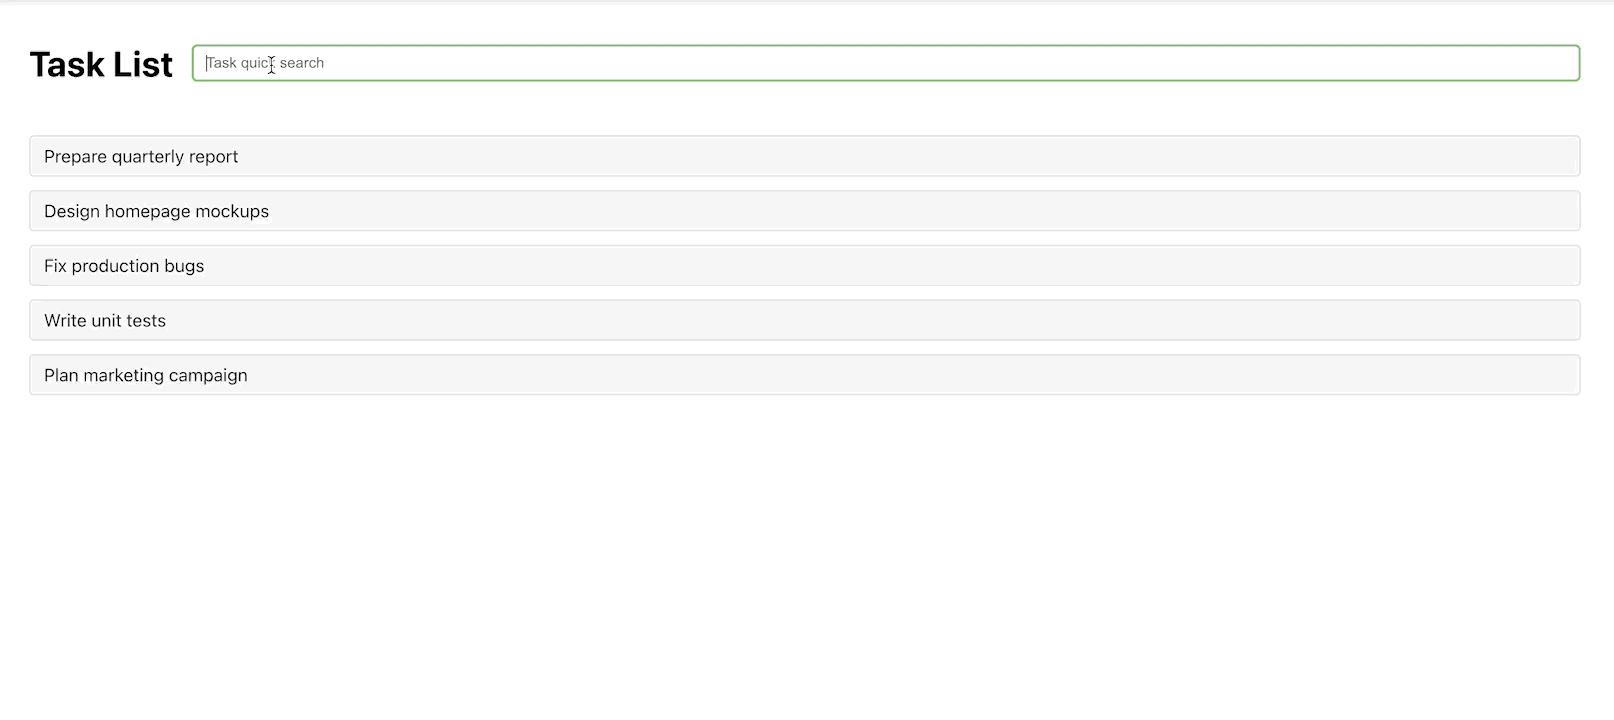
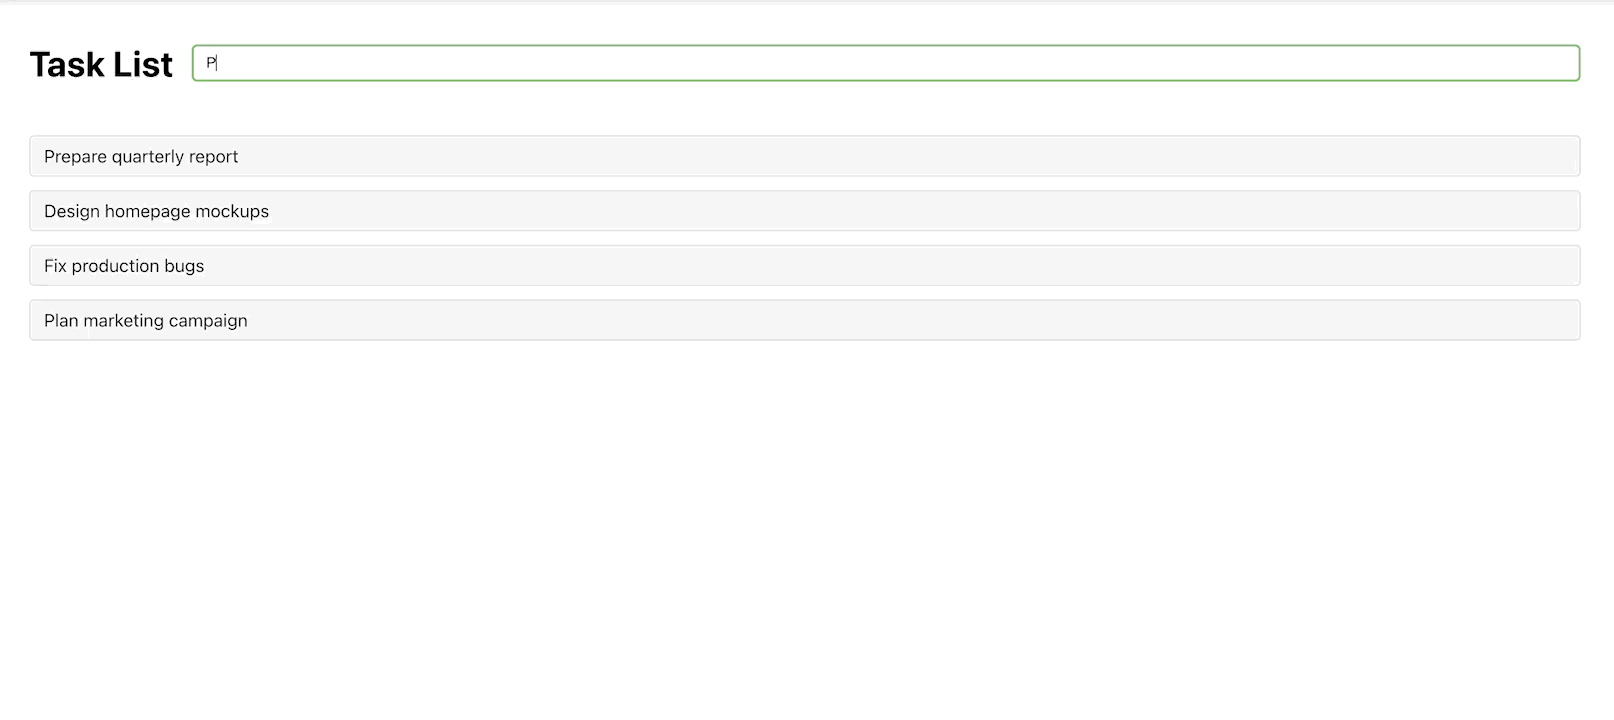
List Page: This page showcases a variety of tasks and includes a quick search input box to help you find specific ones easily. You can click on any task in the list to navigate directly to its details page.
-
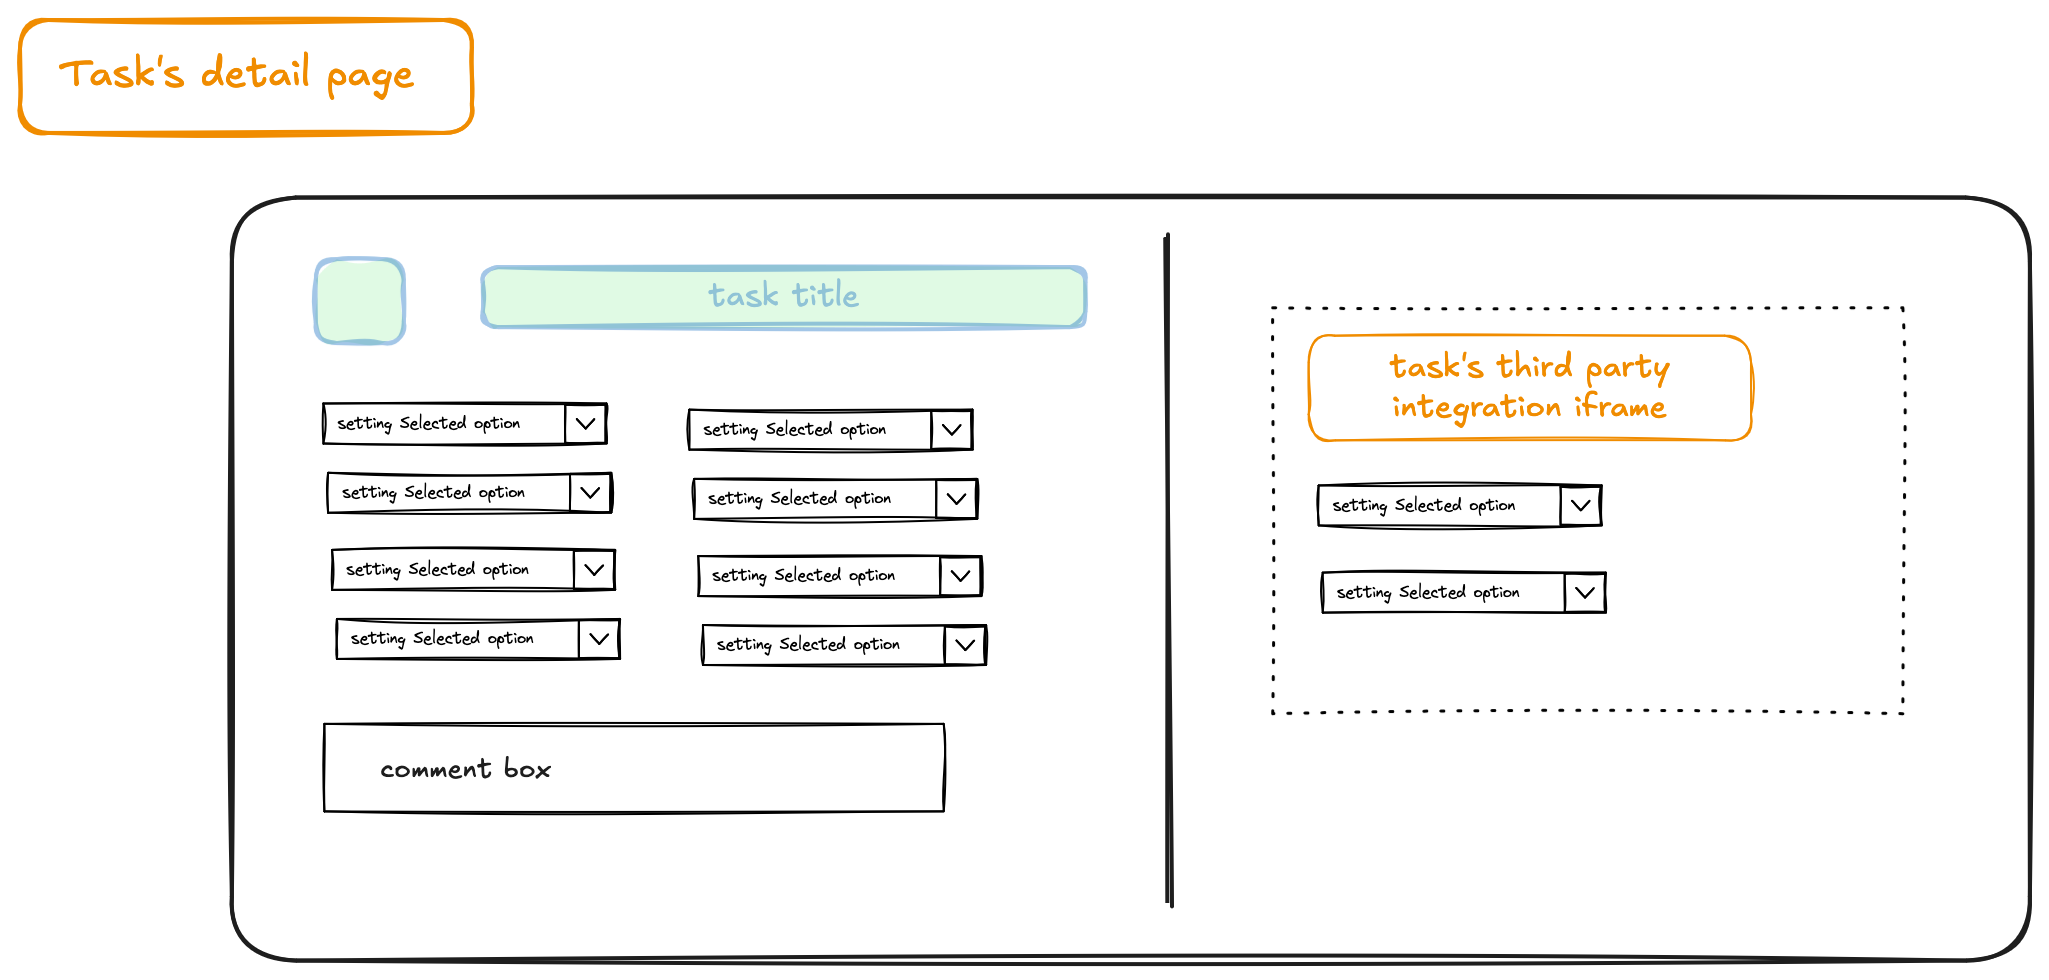
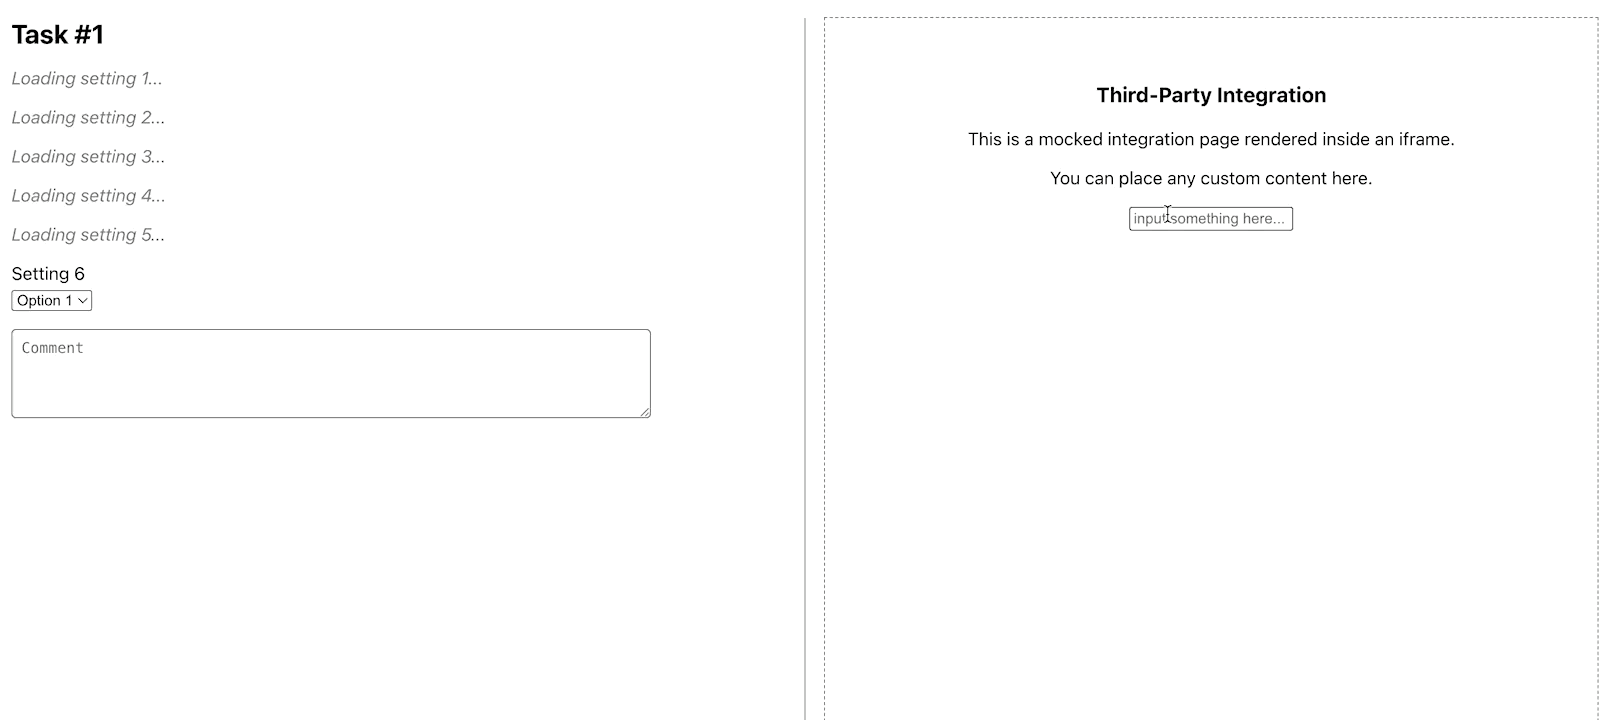
Details Page: This page displays the specific task you selected. It is a resource-intensive page with a complex layout. On the left side, you'll find numerous settings options along with a comment box. Each setting is a heavy UI component that depends on a single API call to retrieve the necessary data. On the right side, there’s a third-party iframe that shows the task's integration details.
The problem is obvious: the task details page takes a long time to load and initialize because of its complex UI and large amount of data. Now, picture waiting through that loading process, only to switch to the list page to search for something. When you return to the same task, the entire page reloads from the beginning, wiping out any progress or settings you had. It’s both frustrating and inefficient! On top of that, when you go back to the list page, your search filter is gone too.
The way
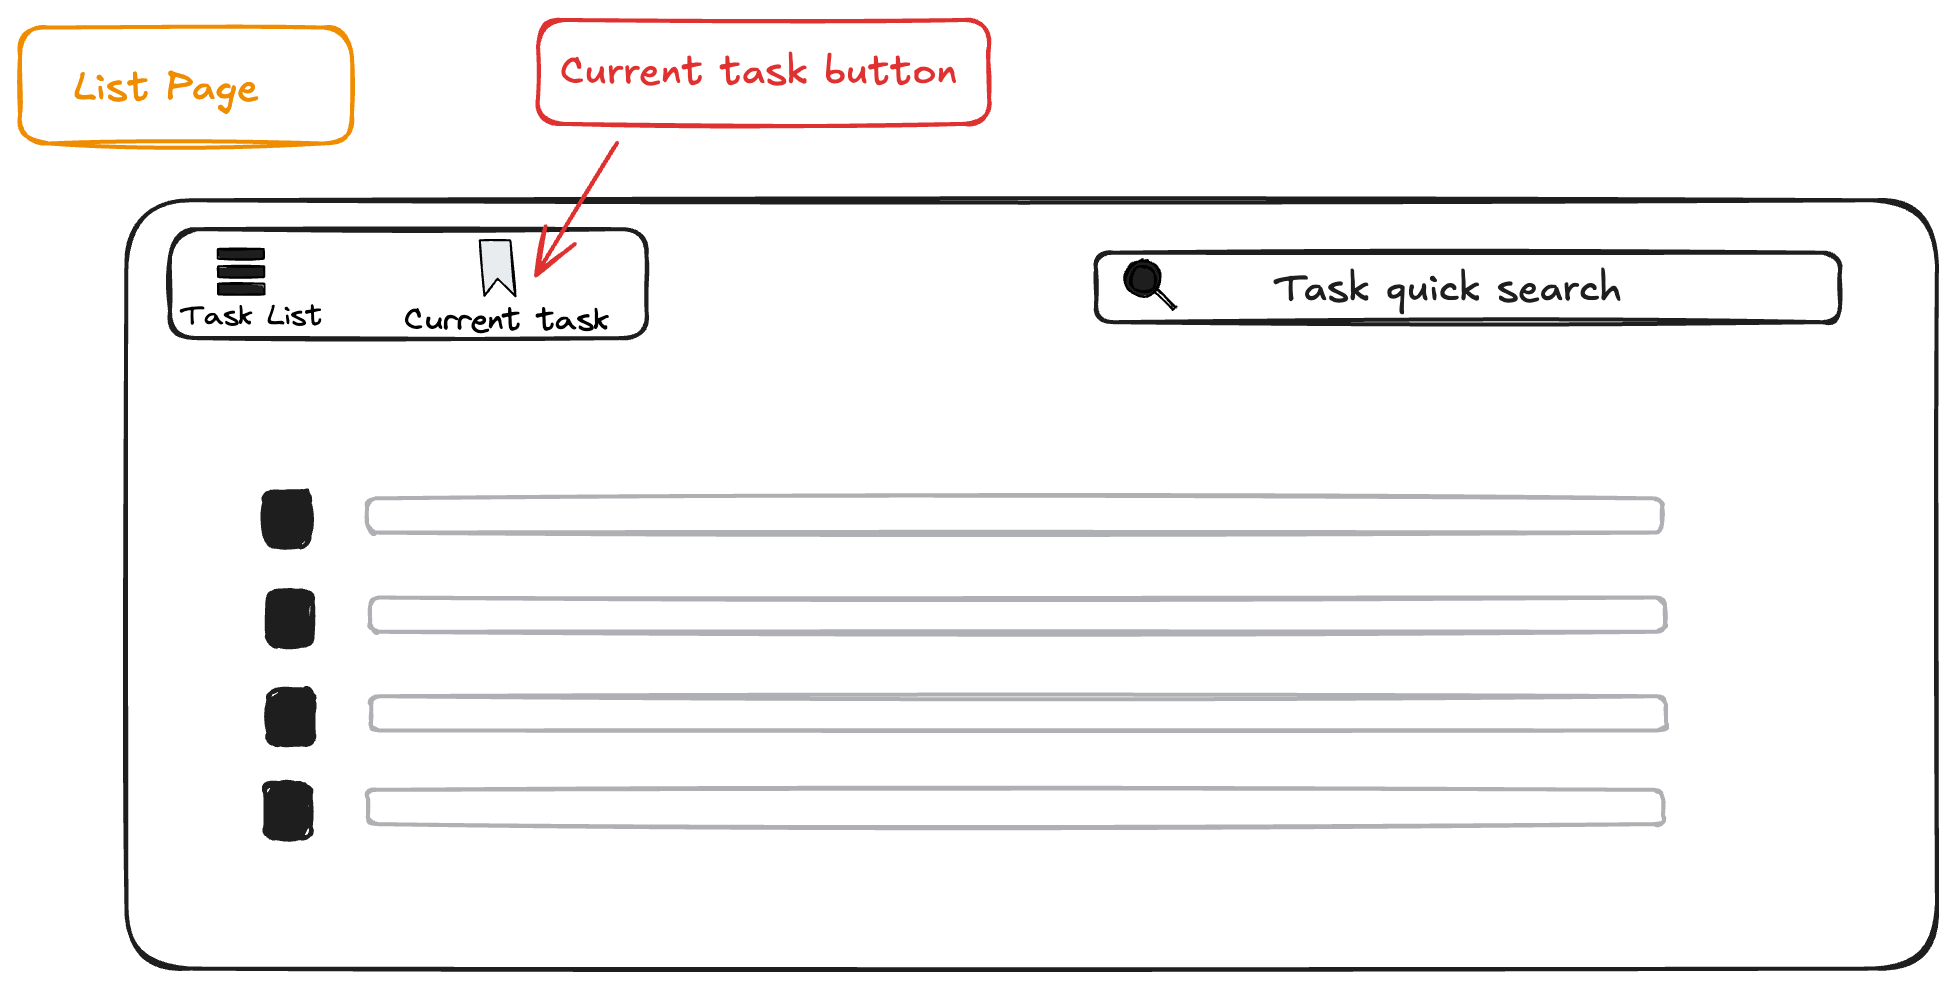
To tackle the issue of unnecessary interruptions, we’ll implement a custom Route Reuse Strategy. The aim is to retain the state of tasks, including filters and data, even after navigating away. To do this, we’ll extend Angular’s RouteReuseStrategy class and override key methods such as shouldDetach, store, shouldAttach, and retrieve. These methods help decide when to cache a route, save its state, and restore it when revisited. Additionally, to easily access the most recently viewed task, we’ll include a "Current Task" button at the top of the task list. This button will remain disabled if no task has been opened during the current session.
Here are the key requirements:
-
Implement a "Current Task" button that allows users to quickly reopen the most recently accessed task without reloading data or the user interface.
-
Ensure that when navigating back to the list page from a details page, the list data is not re-fetched, and the search filter input remains unchanged.
-
Address both of the above requirements using Angular's route reuse strategy.
Time to dive into some code magic! Let’s make Angular’s Route Reuse Strategy work for us, step by step.
Step 1: Configuring the Magic Wand
First, we need to sprinkle some RouteReuseStrategy into our app configuration. Think of it as giving Angular a memory boost:
typescriptCopy code
Step 2: Tagging Routes for Reuse
Next, we’ll add a little “reuse” flag to our routes. This flag tells Angular which routes to keep in its memory vault and what key to use for storage. It’s like labeling your favorite snacks in the fridge so no one else eats them:
typescriptCopy code
Step 3: Crafting the Custom Strategy
Now comes the fun part—our custom RouteReuseStrategy. This is where the real magic happens. It’s like building a treasure chest where Angular can store and retrieve route components without breaking a sweat:
typescriptCopy code
How It Works: A Peek Behind the Curtain
Here’s the play-by-play of how this strategy works. Imagine Angular as a diligent librarian, carefully storing and retrieving books (routes) based on your instructions:
-
When leaving a route:
- Angular asks, “Should I detach this route?” (
shouldDetach). - If the answer is “Yes,” it stores the route in its memory vault (
store).
- Angular asks, “Should I detach this route?” (
-
When returning to a route:
- Angular asks, “Should I attach a cached version of this route?” (
shouldAttach). - If the answer is “Yes,” it retrieves the cached route (
retrieve) and skips re-creating the component. No need to re-runngOnInit—Angular just dusts off the old route and puts it back in place. - If the answer is “No,” Angular creates a fresh component instance, like a brand-new book off the shelf.
- Angular asks, “Should I attach a cached version of this route?” (
-
Throughout navigation: The
shouldReuseRoutemethod decides whether the current and future routes are the same. If they are, Angular skips the detach/attach cycle altogether. It’s like saying, “No need to pack up; we’re staying right here!”
And there you have it—a practical, reusable, and slightly magical implementation of Angular’s Route Reuse Strategy.
By coordinating these five methods you can cache specific routes, preserve component state (UI loading, API data), and provide instant navigation back to previously visited pages—exactly what we leveraged for the “Current Task” shortcut and for keeping the task list filtered state intact.
New Challenge
If you check the iframe section within the task details, you'll notice that the input content is lost when you navigate away from the details page.
 This issue has been spotted in Angular's GitHub repository: https://github.com/angular/angular/issues/59759. But fear not! The fix is as simple as giving the iframe a promotion. Just lift it up to the top level of the app's DOM tree. Why? Because when the page does its little switcheroo, the iframe gets to keep its own state, happily untouched by the route components. Think of it as giving the iframe its own VIP lounge—no interruptions, no forgetting, just smooth sailing!
Let's start our Global Iframe Adventure
Ever wondered how to maintain an iframe's state across route navigations in Angular? Well, buckle up, because we're diving into the world of global iframes.
The Global Iframe Solution: A Hero in Disguise
To tackle the challenge, we created a global iframe component. Think of it as a hidden superhero, quietly maintaining iframe state while you navigate through your app. When you visit the TaskDetail page, this hero springs into action, updating its URL and position based on a placeholder element's bounding rectangle. Let’s break it down.
The Global Iframe Component: The Star of the Show
Here’s the code for our global-iframe.component.ts. It’s where the magic happens:
typescriptCopy code
In this component, we define properties to control the iframe’s URL, position, and visibility. It’s like giving the iframe its own personality—ready to adapt to any situation.
The Global Iframe Service: The Brain Behind the Operation
Now, let’s introduce the global-iframe.service.ts. This service is the mastermind, providing methods to manipulate the iframe’s properties. Here’s the code:
typescriptCopy code
This service is like the control tower, ensuring the iframe knows when to appear, where to position itself, and what content to display. It’s efficient, reliable, and always on duty.
Task Details Component: The Grand Entrance
In the TaskDetail component, we summon the iframe when the page loads for the first time. Here’s how it’s done:
typescriptCopy code
It’s like rolling out the red carpet for the iframe—ensuring it’s perfectly positioned and ready to shine.
Task List Component: The Gatekeeper
In the TaskList component, we manage the iframe’s visibility based on the current route. Here’s the code:
typescriptCopy code
This ensures the iframe only appears when it’s needed, keeping the app clean and efficient. It’s like having a bouncer at the door, letting the iframe in only when it’s invited.
 By implementing this global iframe solution, we’ve created a seamless user experience where the iframe maintains its state across route navigations. It’s practical, efficient, and dare I say, a little fun to implement.
The complete code can be found on my GitHub repository.
This is all about my adventurous journey into the wild world of Angular's route reuse strategy!